Blush Wool Coat
I was lucky enough to come into possession of the most gorgeous blush pink 100% wool fabric. My grandma Patty Jo has been giving me some of the most luxurious fabric, and this wool was some of the best.
I decided I wanted to make a nice coat from this material. Over the past few years, I had fallen in love with a brown coat I had gotten from a fast fashion retailer. I had loved it so much, it ended up extremely ball-y and beat up.
Rather than finding a pattern, I decided to deconstruct the brown coat I loved so much and recreate it in wool. It was risky, knowing I would have to figure it out on my own, given the only direction I had was analysing how the coat was constructed. It was worth the risk.
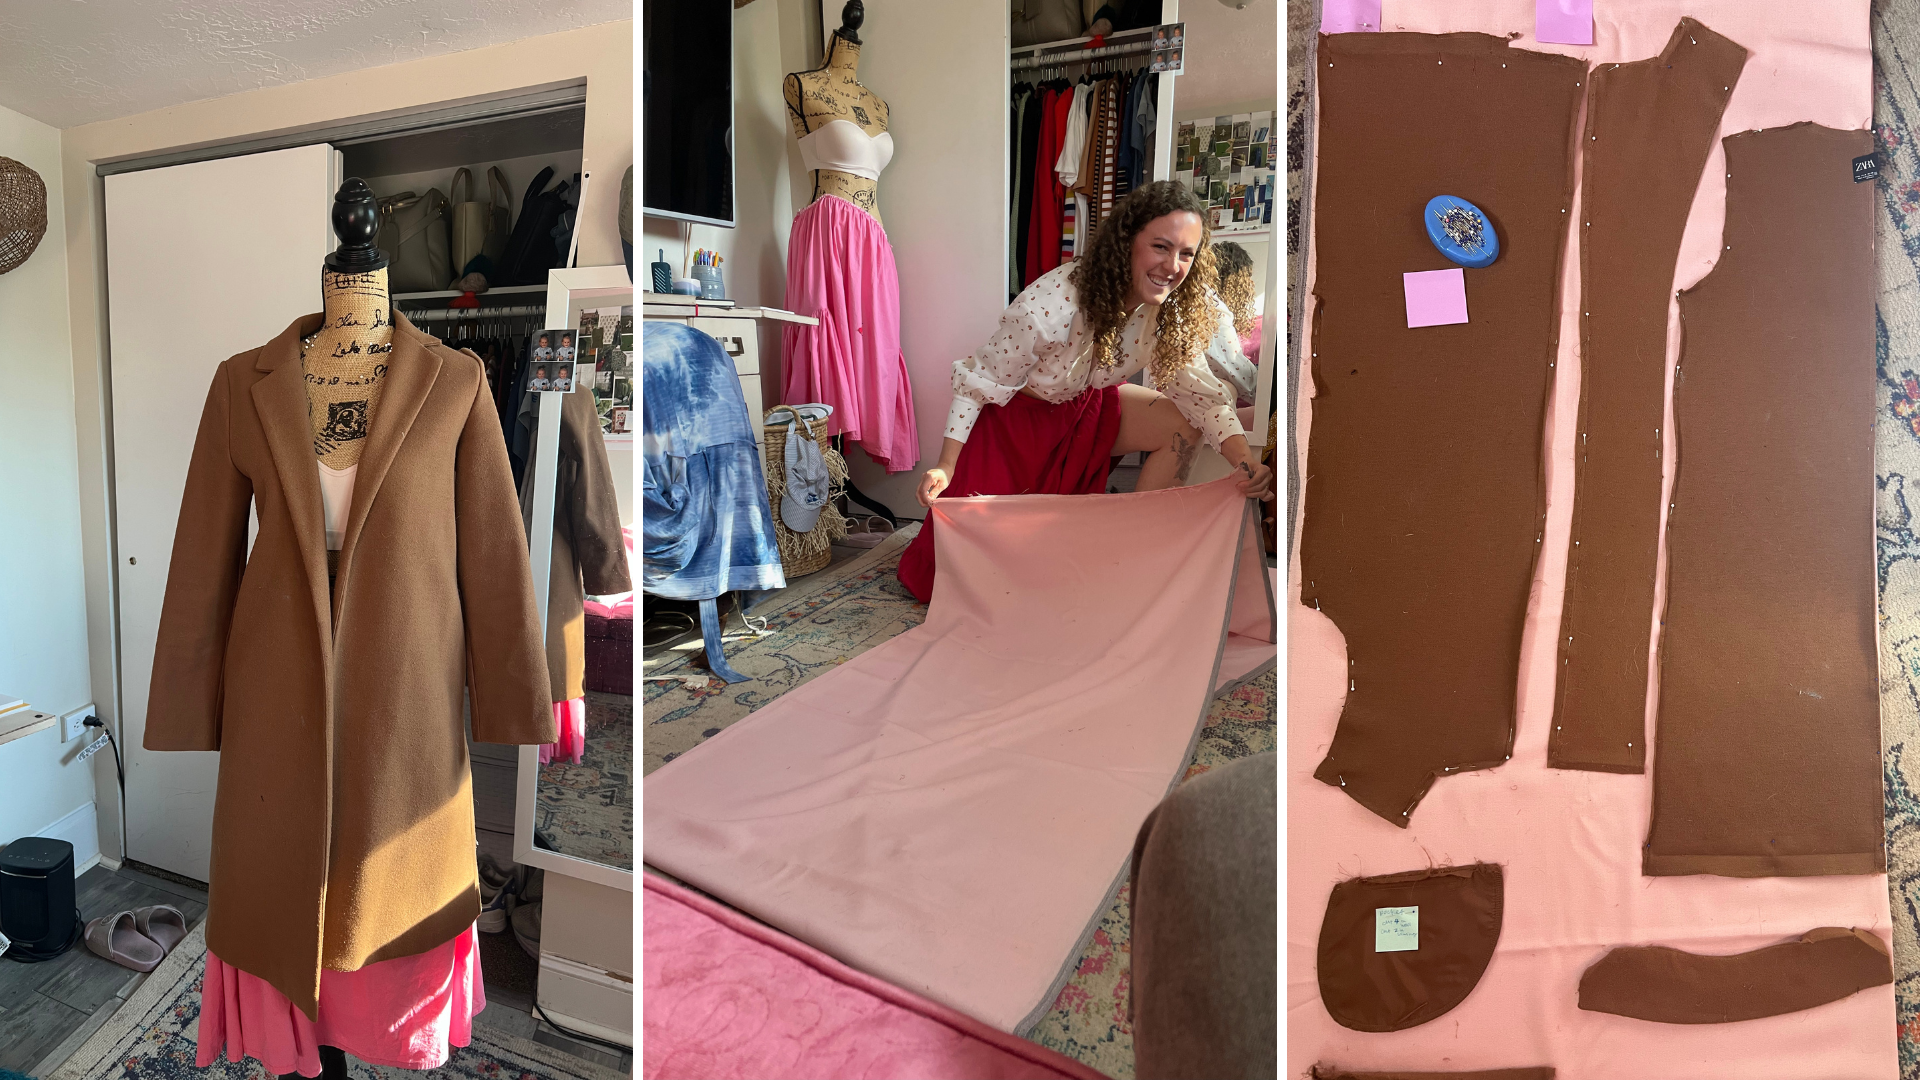
I started by unpicking half of the brown coat. I only needed 1 half to successfully get all the pieces. The other half allowed me to analyze the construction throughout the process. Once deconstructed, I placed the coat pieces on the wool fabric, weighted, and cut them out. I decided to cut double, so the wool would also be used as the lining as well. In hindsight, this wasn’t the best decision. If I could change anything, I would have done a satin like lining- but the deed is done.
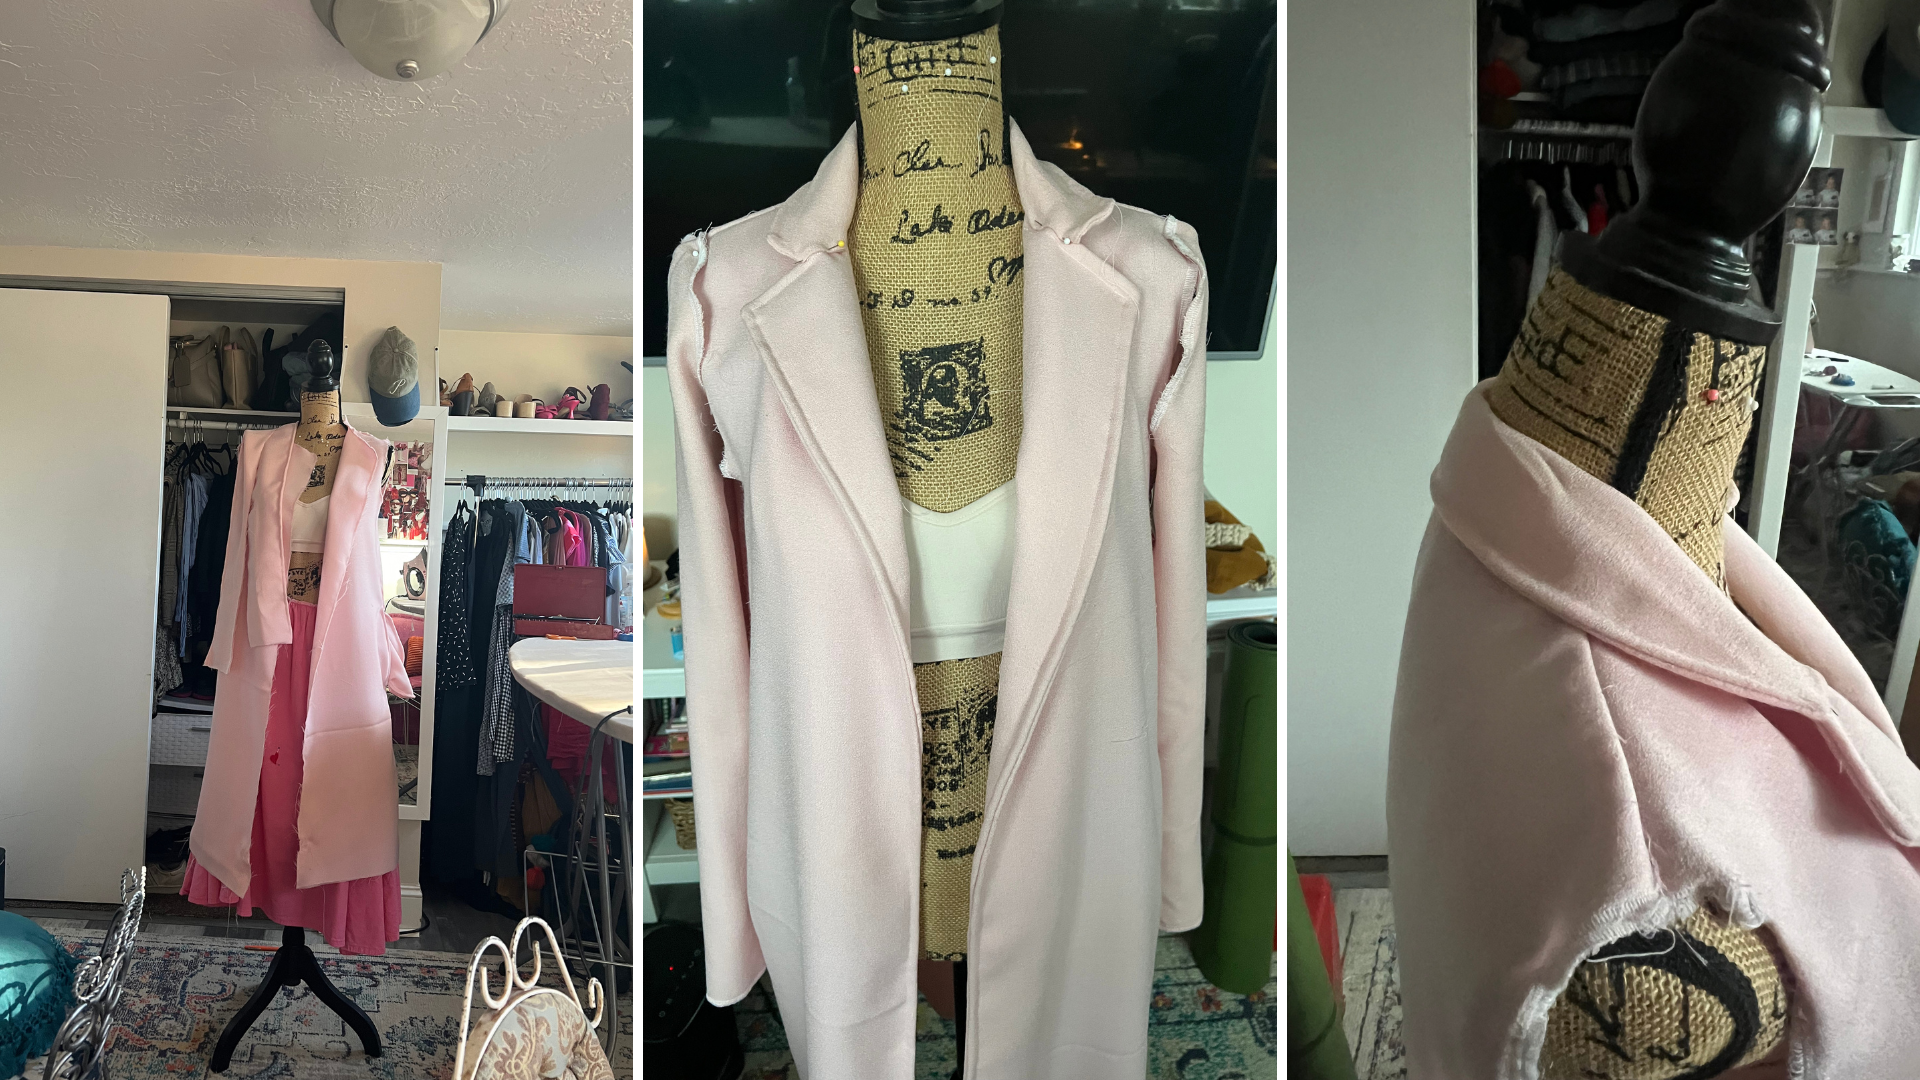
Once I had all the pieces cut out, it was time to re-construct! Originally, I decided to do a French seam when constructing. A French seam allows for the raw edges to be sewn hidden into the fabric. I did so, and after I got nearly done with the coat, I realized this was a bad decision. The wool was far too hefty and bulky to accommodate a French seam. I was unhappy with how it came together, and made the decision to unpick and try again.
Once deconstructed, I decided to overlock all seams. This is the process of using a serger to sew an overlocking stitch on all seams, which prevents fraying. This also created less bulk and helped the 2 layers of wool connect together per piece.
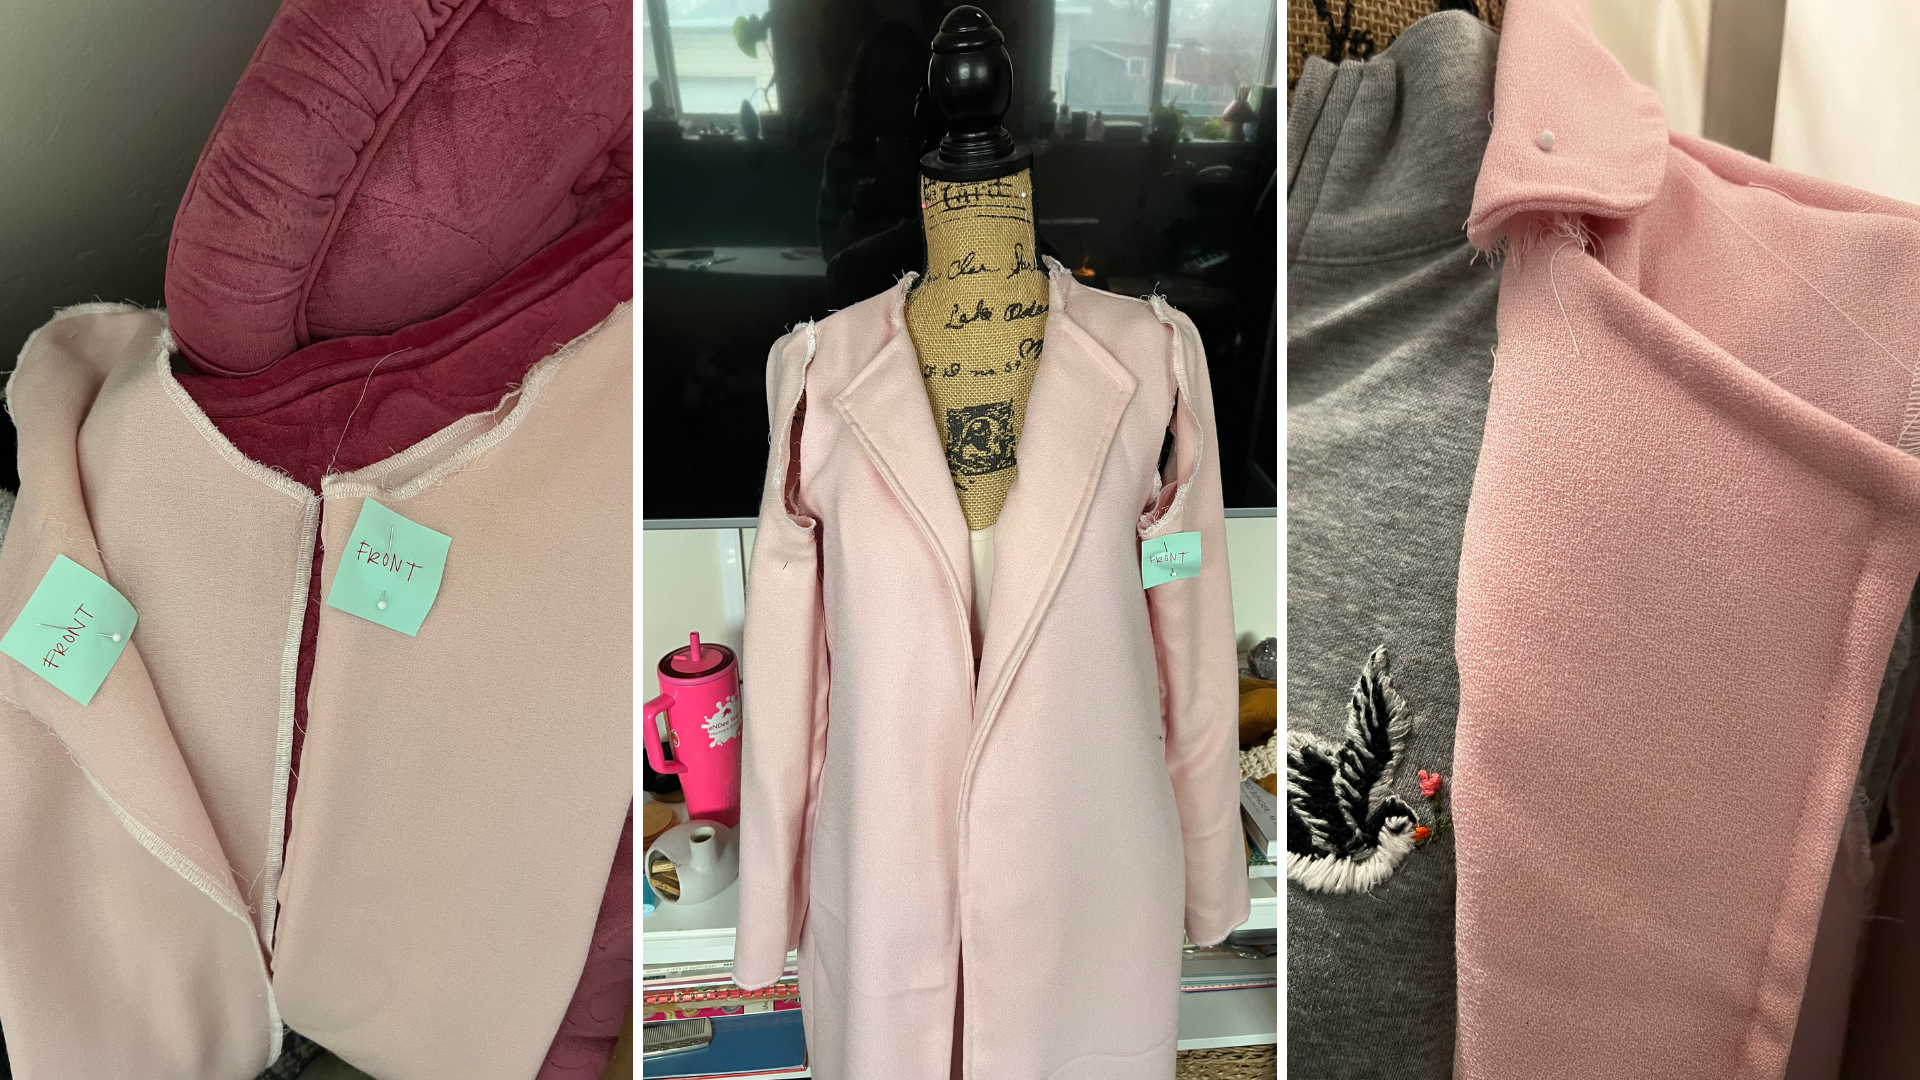
I got the main body together and was happy with how it looked. I then added the sleeves, and something wasn’t quite right. Although when on, it looked ok, on the mannequin and photos, it looked off. After contemplating it for a few days, I realized the sleeves were on backwards!
So I took them off, and realized that not only were they backwards, but essentially both sewn on as right arms. Whoops! I made sure the next time around, I labeled right vs left, and front vs back. Learn from my mistakes, don’t forget the basics, and save yourself some time and energy!!!
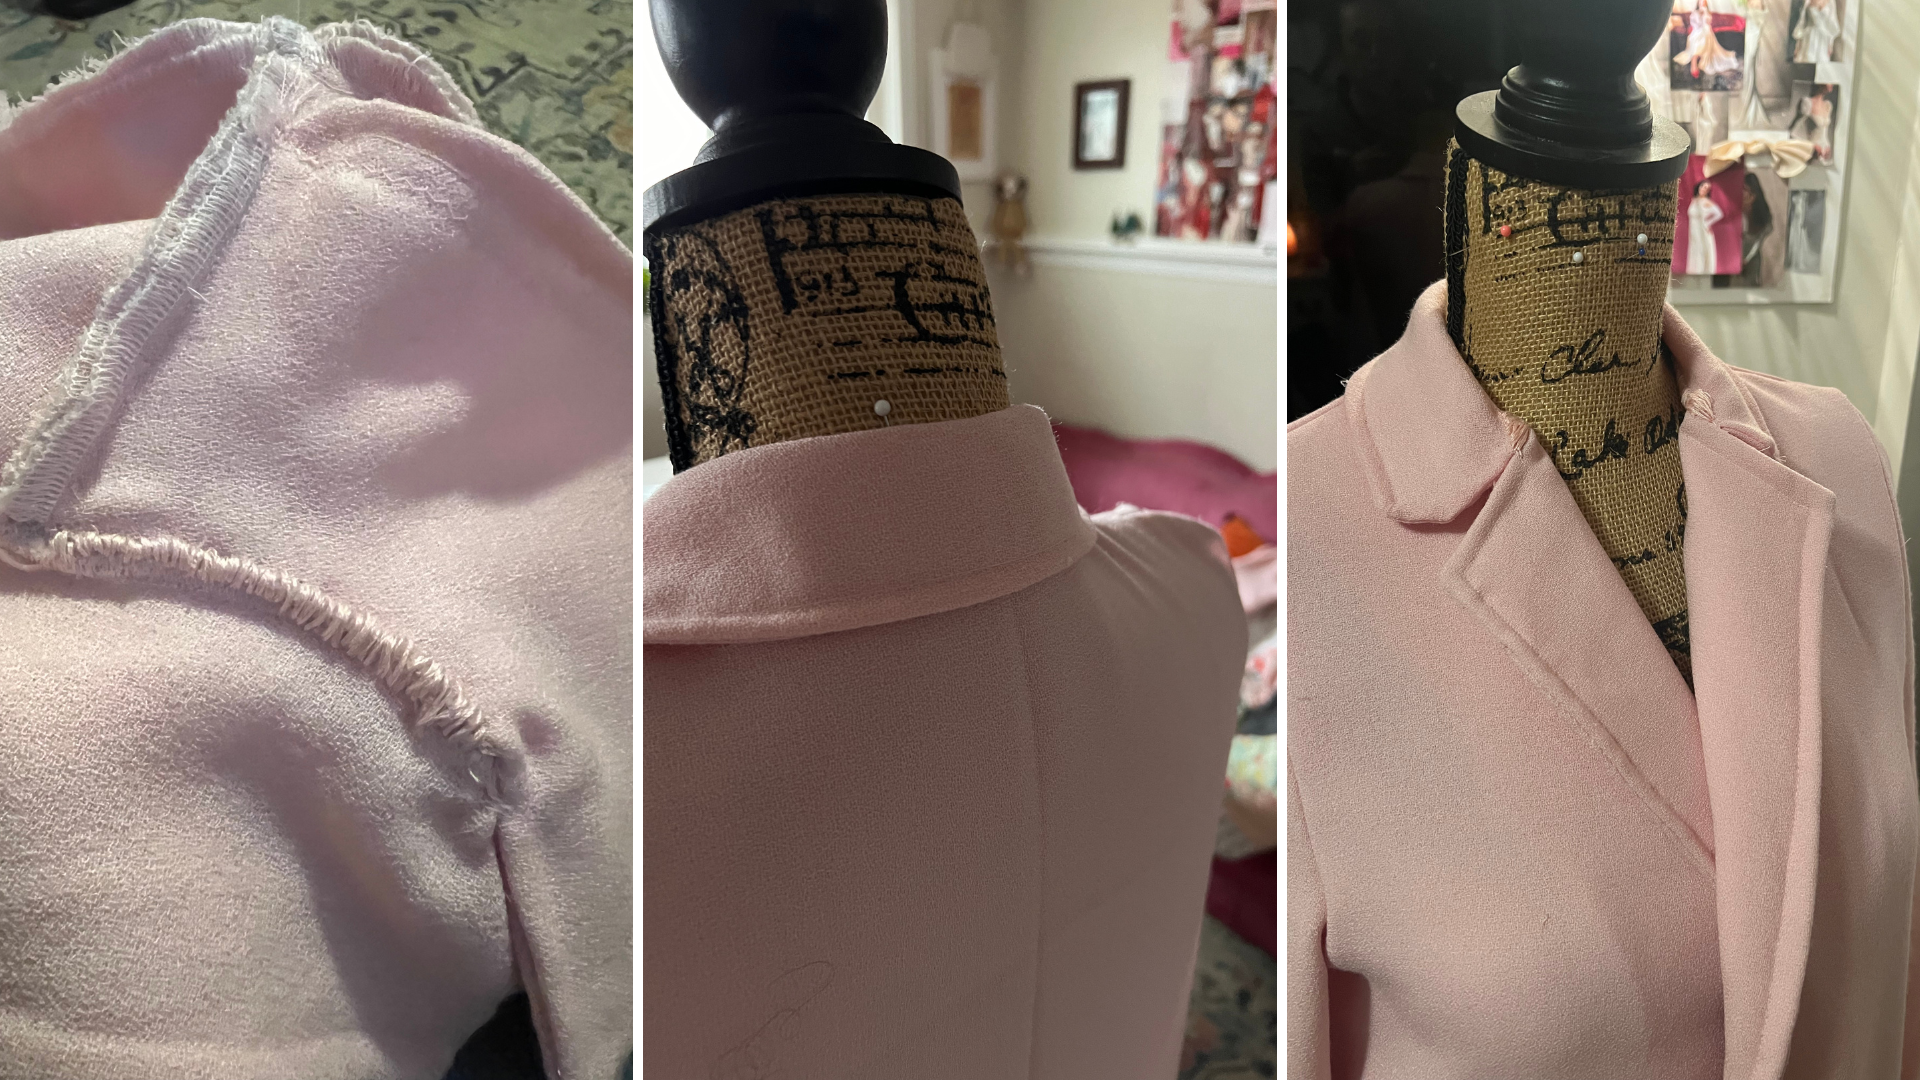
I got everything constructed together, and was happy with how it turned out. I did hand-sew different parts to ensure the collar sat nicely, and certain seams in the neckline were hidden. Although wool is extremely nice, it humbled me. It's very difficult to work with, given you cannot iron it. And if you do, it has to be very low heat, or you will warp or burn the fabric. This makes it difficult to get clean, crisp lines.
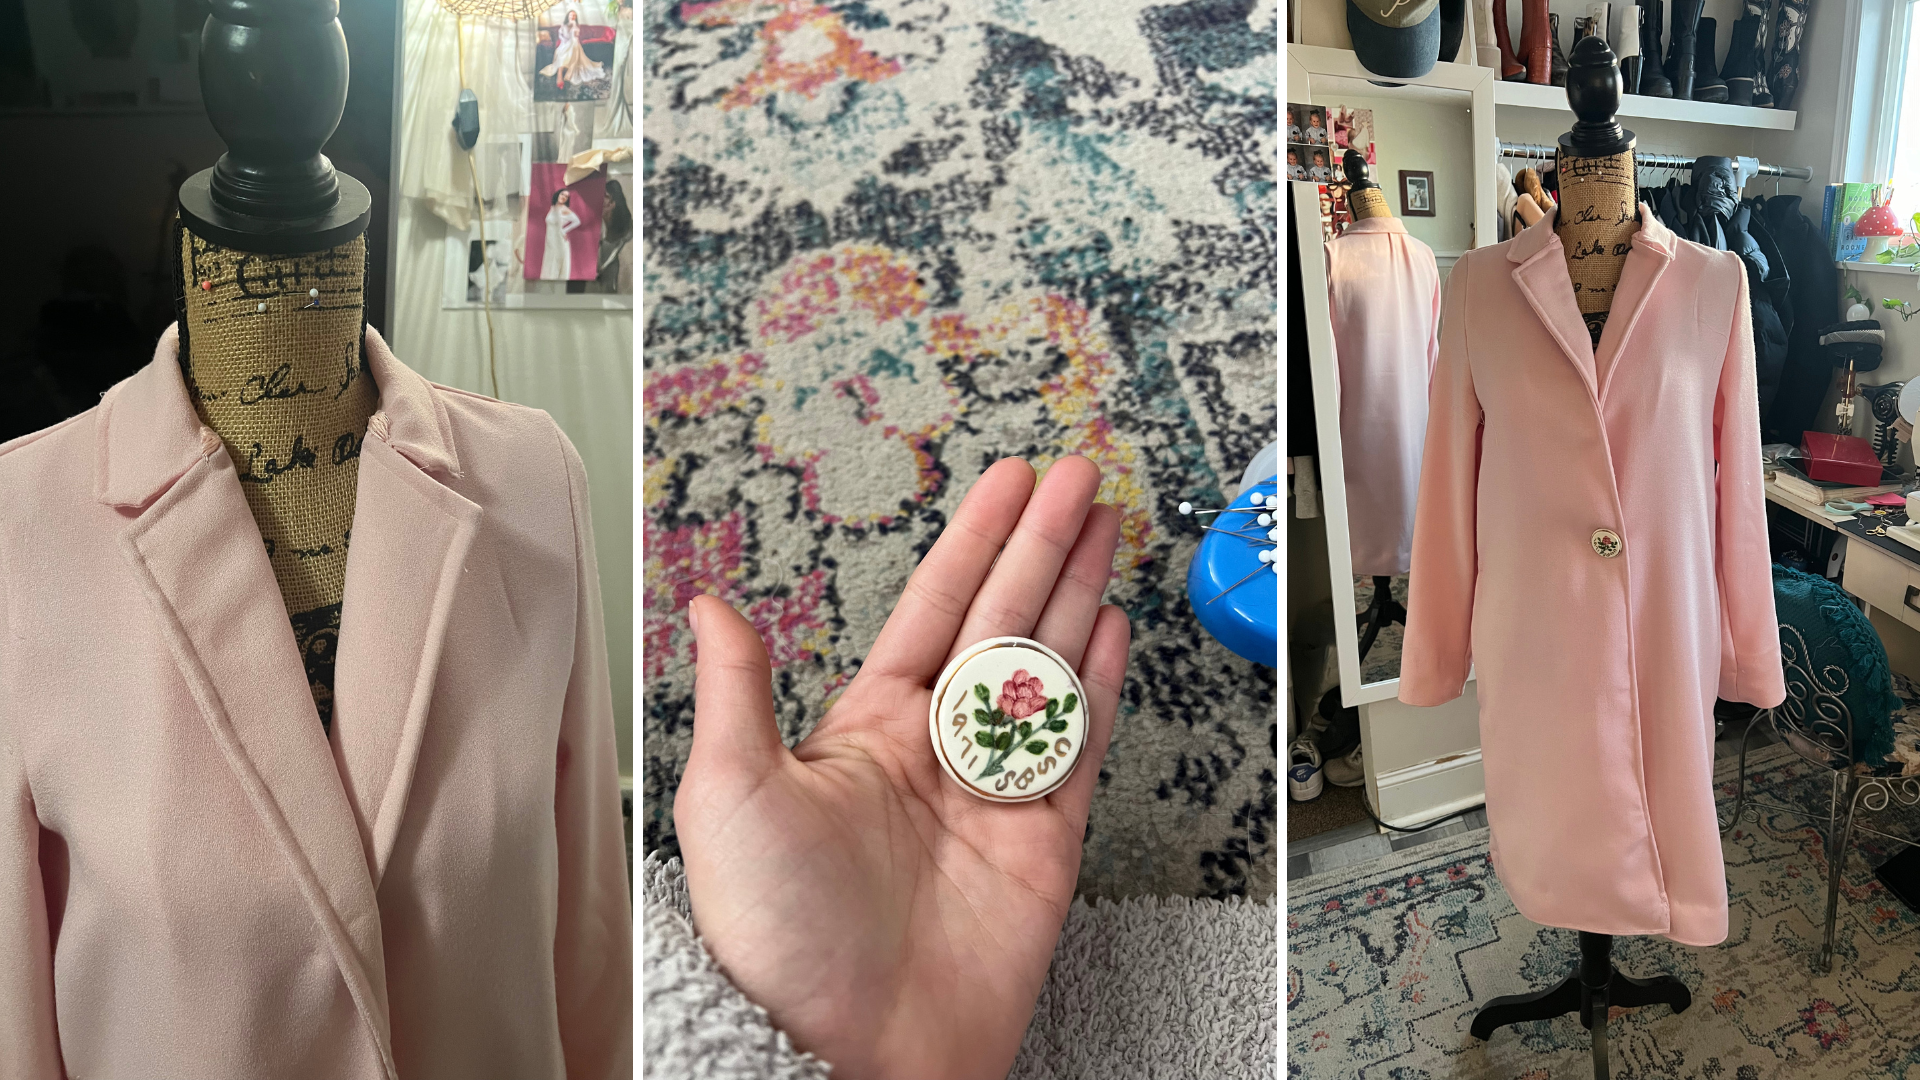
The finishing touch was an antique button. I found this gorgeous button on Etsy, which was created in the California Button Society. I didn’t realize it at the time, but my mom called out that 1971 is when she was born. It made me fall in love with the button even more.
I’ve worn the coat throughout January and February, and March. It’s the perfect layering piece and holds in all the warmth. Although it has many imperfections, I’m so in love with how it turned out, and how it looks on! Worth the 5 months it took me to create it.